
Homemade marshmallows are soft, fluffy, and delicious. They are easy to make with a few simple ingredients.
Making homemade marshmallows is a delightful culinary adventure. These treats are fresher and tastier than store-bought versions. You need gelatin, sugar, water, and corn syrup to get started. The process involves heating and whipping these ingredients until they form a light, airy mixture.
Once set, you can cut them into any shape you desire. Homemade marshmallows are perfect for hot chocolate, s’mores, or as a sweet snack. They can also be customized with flavors and colors. Try making them at home for a fun and rewarding experience. Your friends and family will love these homemade goodies.
Credit: www.foodiewithfamily.com
Introduction To Homemade Marshmallows
Making marshmallows at home is fun and easy. You can control the ingredients. No preservatives or artificial colors. Homemade marshmallows are fresher and tastier.
Homemade marshmallows can be customized. Add your favorite flavors and colors. They are a great project for kids. Learning how to make them can be a science experiment. You can create shapes and sizes you like. Homemade marshmallows make great gifts. Everyone loves a personal touch.

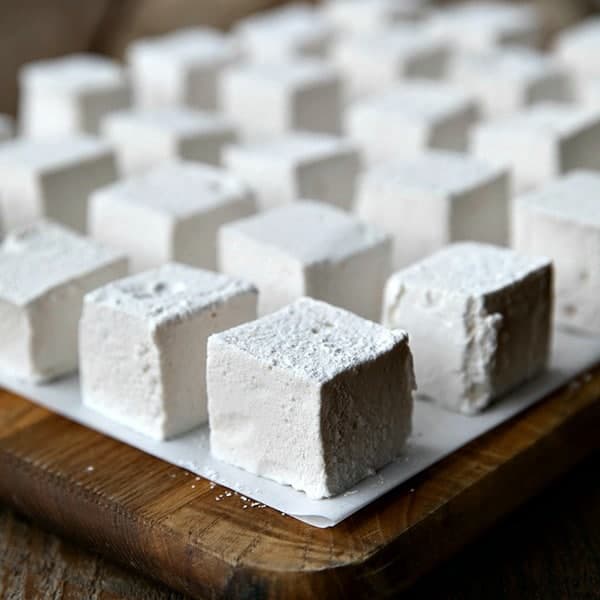
Credit: houseofnasheats.com
Essential Ingredients
Crafting homemade marshmallows requires sugar, gelatin, water, and vanilla extract. Whip these essential ingredients into fluffy, sweet perfection.
Basic Components
You need gelatin to make marshmallows. Use unflavored gelatin for best results. Sugar is also important. It makes the marshmallows sweet and tasty. Corn syrup helps keep the texture smooth. Water is used to dissolve the gelatin and sugar. Salt enhances the flavor. Finally, vanilla extract adds a lovely aroma and taste.
Optional Add-ins
Feel free to add food coloring for fun colors. Flavor extracts like mint or lemon can change the taste. Add chocolate chips or candy bits for extra sweetness. You can also roll the marshmallows in powdered sugar or shredded coconut for a special touch.
Necessary Equipment
You need a mixing bowl. A whisk is also very important. Use a measuring cup to get the right amounts. A spatula helps mix everything well. A candy thermometer is a must. It checks the temperature of the sugar.
A stand mixer makes things easier. Gelatin is used to make marshmallows fluffy. Corn syrup helps to sweeten the mix. Powdered sugar keeps the marshmallows from sticking. Vanilla extract adds flavor. Use a sharp knife to cut the marshmallows.

Credit: www.theflavorbender.com
Preparation Steps
Gather all your ingredients first. This includes sugar, gelatin, and vanilla extract. Measure them out so they’re ready to use. Keep a candy thermometer handy. It will help you get the right temperature.
Make sure your workspace is clean and organized. You need a large mixing bowl and a stand mixer. Line a pan with parchment paper. Lightly grease it to prevent sticking. Have powdered sugar ready for dusting.
Making The Marshmallow Base
Start with sugar, corn syrup, and water in a pot. Heat them over medium heat. Stir until the sugar dissolves. Use a candy thermometer to check the temperature. The syrup needs to reach 240°F. Once it does, remove it from the heat. Be careful not to burn the sugar. Hot sugar can be very dangerous.
Place gelatin and cold water in a large bowl. Let it sit for five minutes. Slowly pour the hot syrup into the gelatin. Use a mixer to whip the mixture. Start on low speed. Gradually increase to high speed. Whip until the mixture becomes fluffy and thick. This can take about 10 minutes.
Shaping And Setting
Creating perfectly shaped homemade marshmallows requires the right setting time and technique. Use a sharp knife to cut them cleanly. Dust with powdered sugar to prevent sticking.
Pouring Into Molds
Pour the marshmallow mixture into prepared molds. Spread it evenly with a spatula. Make sure to coat the spatula with oil. This prevents sticking. Use a wet knife to smooth the top. Sprinkle powdered sugar on top. This keeps it from being sticky. Let it sit for a few minutes before moving. The mixture should fill the molds completely. It will spread and settle as it cools.
Allowing To Set
Allow the marshmallows to set for at least 4 hours. Overnight is even better. This ensures they are firm. The room should be cool and dry. Place the molds on a flat surface. Cover with a clean cloth. This keeps dust and dirt away. Do not disturb them while setting. Check them after the recommended time. They should feel firm to touch. If still soft, give them more time.
Cutting And Coating
Use a sharp knife to cut the marshmallows. Oil the knife to prevent sticking. Make straight cuts for squares. Use cookie cutters for fun shapes. Clean the knife often. Dust the cut edges with powdered sugar.
Roll marshmallows in powdered sugar. Try cocoa powder for a chocolatey touch. Use desiccated coconut for a tropical flavor. Finely crushed cookies add crunch. Mix and match coatings for variety. Store coated marshmallows in an airtight container.
Flavor Variations
Classic vanilla marshmallows are soft and fluffy. They have a sweet and simple taste. Vanilla extract gives them a rich flavor. These are perfect for hot chocolate. You can also use them in s’mores. Kids love the classic taste.
Try adding cocoa powder for chocolate marshmallows. Use peppermint extract for a holiday twist. Mix in fruit puree for fruity flavors. Sprinkle cocoa or powdered sugar on top for extra fun. Add food coloring to make them colorful. You can also mix in crushed candies for a fun texture. Experiment with different flavors for unique treats. Each twist makes marshmallows exciting.
Storage And Shelf Life
Store homemade marshmallows in an airtight container. Keep them at room temperature. Avoid places with high humidity. Place wax paper between layers. This prevents them from sticking together. Do not refrigerate marshmallows. Cold can make them hard and sticky.
Homemade marshmallows last about two weeks. Store them properly to maintain freshness. Use them within this time for best taste. After two weeks, they might get stale. Fresh marshmallows are always better.
Serving Suggestions
Enjoy homemade marshmallows with hot cocoa. Melt marshmallows into a cup of coffee. Add them to your favorite dessert. They taste great with graham crackers and chocolate. Try them on top of ice cream. Use them in s’mores for a campfire treat. Pair with fresh fruit for a fun snack.
Wrap marshmallows in clear cellophane bags. Tie with a colorful ribbon. Place them in a decorative box. Add a personalized tag. Use small jars to hold marshmallows. Layer with different flavors or colors. Include a recipe card with each gift. Make them look special for any occasion.
Frequently Asked Questions
How Do You Store Homemade Marshmallows?
Store homemade marshmallows in an airtight container at room temperature. They stay fresh for up to two weeks.
Can You Freeze Homemade Marshmallows?
Yes, you can freeze homemade marshmallows. Place them in a freezer-safe bag for up to three months.
Why Are My Marshmallows Sticky?
Marshmallows become sticky when exposed to moisture. Roll them in powdered sugar to prevent sticking.
What Ingredients Are In Homemade Marshmallows?
Homemade marshmallows typically include sugar, water, gelatin, and corn syrup. Flavorings like vanilla are often added.
How Long Do Homemade Marshmallows Take To Set?
Homemade marshmallows usually take about 6 hours to set. For best results, let them set overnight.
Conclusion
Crafting homemade marshmallows is simpler than you think. They bring joy to any occasion with their fluffy texture. Impress your friends and family with this delightful treat. Plus, making them yourself ensures you know exactly what’s inside. Give it a try and savor the sweet satisfaction of homemade marshmallows.


